Label DeepLabCut
This module allows you to label a video according to a DeepLabCut config file. Read more about DeeplabCut here: DeepLabCut.
How to use
Setup the project
1. Create a directory for your project. You can name it whatever you want.
2. Create a yaml config file for the project. Put it in the project directory.
The config file should contain the path to all the videos you want to label, the path to your project directory, the parts you want
to label and the number of frames you want to label. This is an example of how it should be structured: config file.
You can download the file and change it to suit your project.
3. Create a directory named “videos” inside the project directory.
4. Put all the videos you want to label inside the “videos” directory.
5. Create a directory named “labeled-data” inside the project directory.
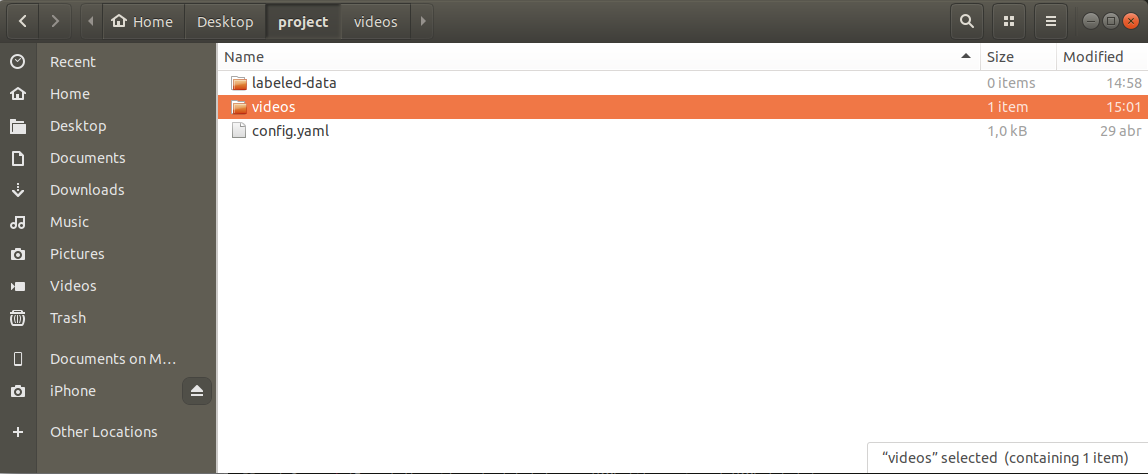
The parent directory should now look like this:
6. This step is done. Now move to the next step of importing the videos.
Importing from a YAML file
1. Open the “Modules” tab and choose the “Label DeepLabCut” module.
2. Choose the yaml to import from. To do this, click the “Open” button to the right of “YAML to import from” and then browse your folders until you find the file.
3. Click the “Import” button. Now the deeplabcut module will run and extract as many frames from the video as defined in the config file. This might take a while. You can track the progress in the command line. Once it’s finished, a message will pop up informing you that the import is finished.
4. This step is done. Now move to the next step of labeling the videos.
Labeling the videos
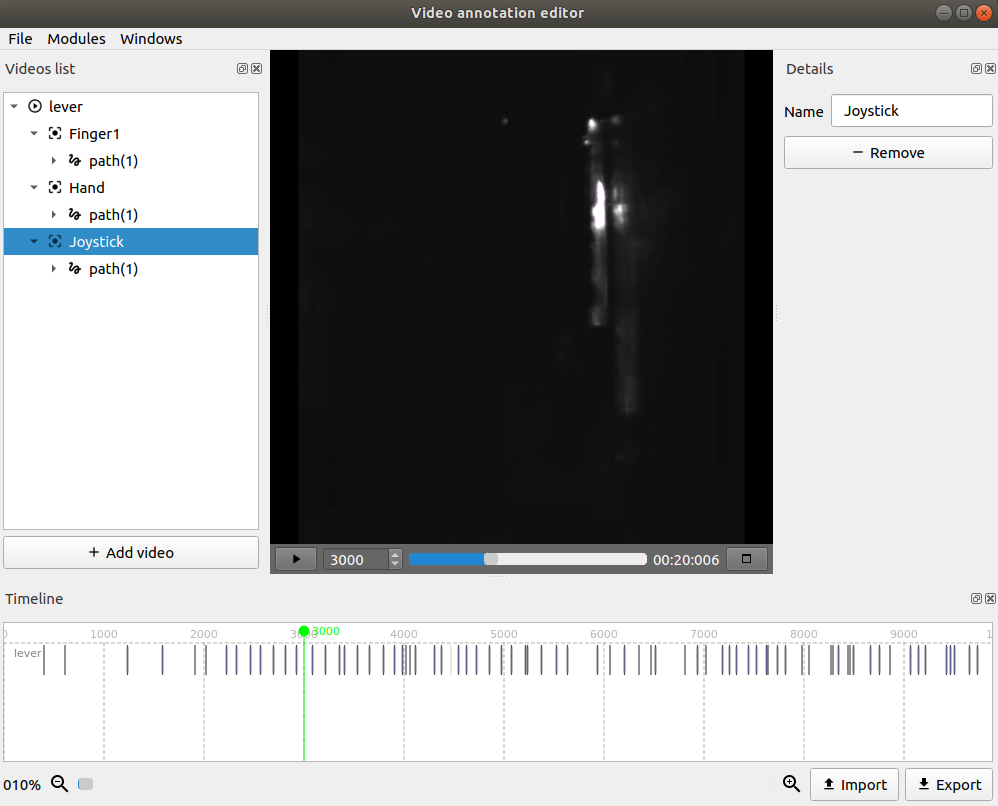
Now you should have one or more videos created. Each video should have an object for each of the parts you want to label, and each part should have a path. Your timeline should also have a row for each one of the videos you’re labeling.
Each frame you want to label is represented in the timeline as an event. It should look like a small vertical purple bar.
1. Select the row of the video you’re about to label in the timeline. In most cases this should be the first row of the timeline. It should become highlighted in blue. Right now, your project should look like this:
2. Now you have to go through each frame, and for each object, select its path, then click the “Mark Point” button and then select its location with the Left Mouse Button.
You can do all of this using only the mouse, but to help you be more productive, there are a couple of very useful shortcuts:
- U - Selects the path of the next object and also clicks the “Mark point” button.
- I - Moves to the next event and also clicks the “Mark point” button.
- O - If a path is selected, clicks the “Mark point” button.
- E - Moves to the next event. If no event is selected, moves to the first event.
- Q - Moves to the previous event. If no event is selected, moves to the last event.
To quickly label, you should either:
- Label an object in all frames using the I shortcut
- Label all object in a frame using the U shortcut and then move to the next frame with the E shortcut
Note
You can select the color of each object’s path, thereby changing the color of its “Mark point” marker on the right side. Simply click on “Choose a color” and then select the color you want.
3. To see if you maybe missed labeling one of the frames, you can do this:
- Open the “Modules” tab and choose the “Label DeepLabCut” module.
- Click the “Check unlabeled frames” button.
- A text file will be created in your current directory. This text file tells you for each video and each part, what frames you still haven’t labeled. If a part has no frames specified, then you have labeled that object in every frame.
4. Once you don’t have any frames left to label, you can move to the next step of exporting to a csv file.
Exporting to a CSV file
1. Open the “Modules” tab and choose the “Label DeepLabCut” module.
2. Choose the directory you want the file to be written to. To do this, click the “Open” button to the right of “Output directory” and then browse your folders to select the one you want.
3. Choose the name you want for csv file. You simply have to write the name in the textbox to the right of “Output file name”. The ”.csv” extension will be automatically added to the end.
4. Click the “Export” button. The resulting csv file will now be in the directory you chose before.
5. You’re done with the labeling of the videos. Now you can use deeplabcut to analyse the resulting csv file.
Result
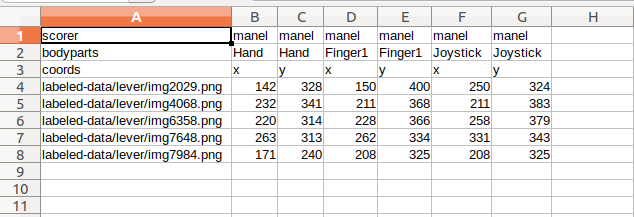
The result will be a csv file for each labeled video. The csv file will look like this:
Install DeepLabCut
for windows and mac:
Run the following commands:
pip install deeplabcut
pip install -U wxPython
pip install --ignore-installed tensorflow==1.10
for linux:
pip install deeplabcut
pip install https://extras.wxpython.org/wxPython4/extras/linux/gtk3/ubuntu-18.04/wxPython-4.0.4-cp36-cp36m-linux_x86_64.whl
pip install --ignore-installed tensorflow==1.10