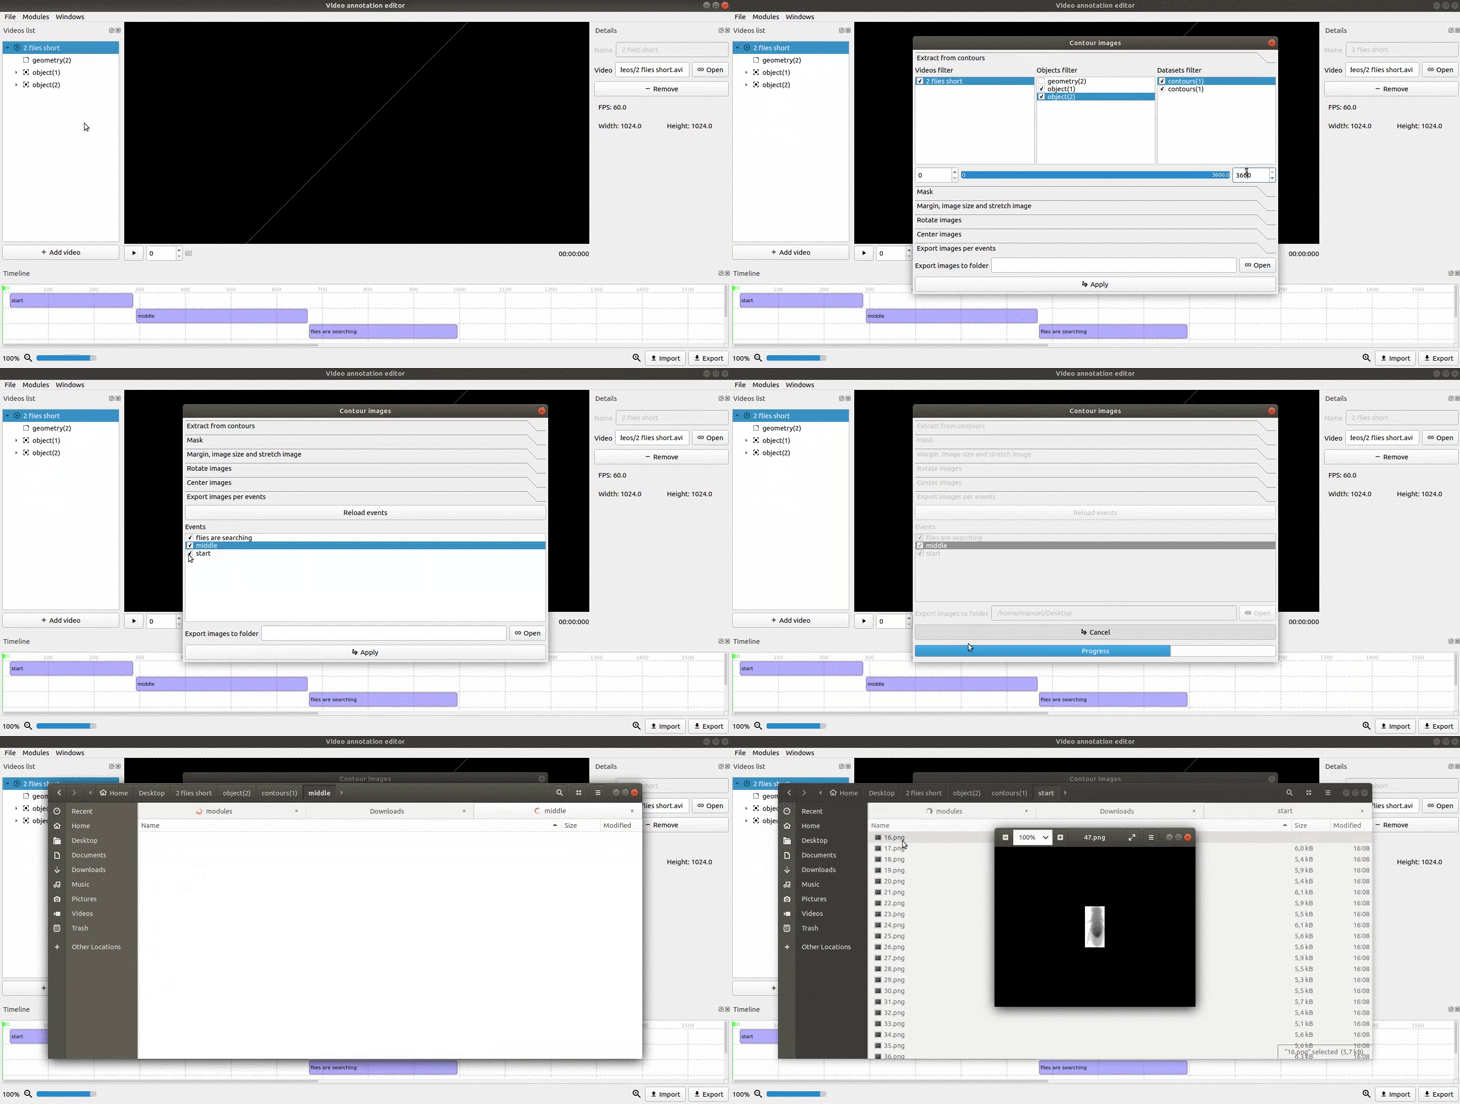
Extract the contour’s images
This module generates images by extracting them from a contour.
How to use
Extract from contours
In this tab, check the corresponding checkboxes to select the video, the object and the object’s contour you want to extract the images from.
Use the blue slider or the left and right textboxes to set a start and an end frame. The images will only be extracted for the frames in that interval.
Note
To change the start and end frame you also have to click on the name of the video, not just the checkbox
Mask
In this tab you can apply diferent masks to the image:
- to apply a simple mask check “Apply a mask to the image”
- to apply a dilated mask check “Dilate the mask and apply it to the image” and use the “Dilate size” slider to choose the dilation of the mask
- to apply a circular mask check “Apply a circular mask to the image” and use the “Circular radius” slider to choose the radius of the mask
- to apply the minimum ellipse of the contours as a mask to the image, check “Apply the min. ellipse as a mask to the image”
- to apply the minimum rectangle of the contours as a mask to the image, check “Apply the min. rect as a mask to the image”
Margin, image size and stretch image
In this tab you change the image size, strech the image and change its margins.
To change the image margins, use the “Margin size” slider.
To set the size of an image, use the “Image size” slider to set its size and then check “Stretch image” to stretch it. If you change the size of an image, you can also cut its height and/or width. To do this check “Cut image” and then use the blue sliders or the left and right textboxes to select the portion of the image that you want.
Note
The first slider changes the width and the second one changes the height of the image
Rotate images
In this tab you can rotate the extracted images in different ways:
- if you want the contour in the extracted images to always be facing up, check “Turn the contour always up”
- if you want the contour in the extracted images to always be facing down, check “Turn the contour always down”
- to rotate all the images using a fixed angle, check “Use a fixed orientation” and use the “Rotate the images using a fixed angle” slider to set the angle
- to rotate the images using the orientation of another contour, check “Use the orientation of other contour” and then choose the other contour by first selecting the correspoding video, then the object and finally the contour
Note
You can only use one of these options at the same time
Center images
In this tab you can center the images.
If you want to center the images using another dataset, check “Use a dataset to center the image” and then select the dataset by first selecting the correspoding video, then the object and finally the dataset(path/contour).
Export images per events
Note
Click the “Reload events” button if you don’t see any events in the “Events” tab
Note
If you don’t choose a directory, then a folder named “contour-images” will be created in your current directory.
Result
The result is a folder in the directory you chose with the name of your video. This folder contains all the images generated by the module. Navigate the folder to find the images, as they will be inside subfolders.
Example
